There are 7 billion people in the world, and only 5-10% of us speak English. At some point, you’re going to want your app to reach those outside the English-speaking world. The most important way to help that process along is to translate your app into other languages.
This article will go into the process of translating, but not localizing, your app. What’s the difference? Translation is strictly changing words into other languages. It’s a part of localization, but localization is much larger than just language. Localizing is knowing that French quotation marks look like «», knowing that the British write dates “16 May 2014”, knowing that ß sorts as “ss” in German, and knowing that Americans don’t use the metric system.
I’ll be writing a follow-up article on localization soon, so stay tuned!
The process of translating an iOS app is pretty straightforward, if somewhat tedious. There are three major steps of setup, which together have you mark every displayed string in the app for translation. Then, there are three steps of work to do before every release, which extract the marked strings, give them to you for translation, and put them back as translated strings files.
Work to do for the first translation
1. Mark all display strings in code.
Mark all of your app’s literal strings (for display) with NSLocalizedString. If you don’t have a literal string, use -[NSBundle localizedStringForKey:value:table:] and add the key to a strings file.
Before:
NSString *formatString = @"My iPhone is at (%f, %f).";
label.text = [NSString stringWithFormat:formatString, latitude, longitude];
label2.text = stringFromNetwork;
After:
NSString *formatString = NSLocalizedString(@"My iPhone is at (%f, %f).",
                                           @"(<latitude>, <longitude>)");
label.text = [NSString stringWithFormat:, latitude, longitude];
label2.text = [[NSBundle mainBundle] localizedStringForKey:keyFromNetwork
                                                     value:keyFromNetwork
                                                     table:@"Filename"];
(and then in Filename.strings, add "The actual key from the network" = "The value that you want to show in English";)
2. Localize your nibs and storyboards with Base Localization.
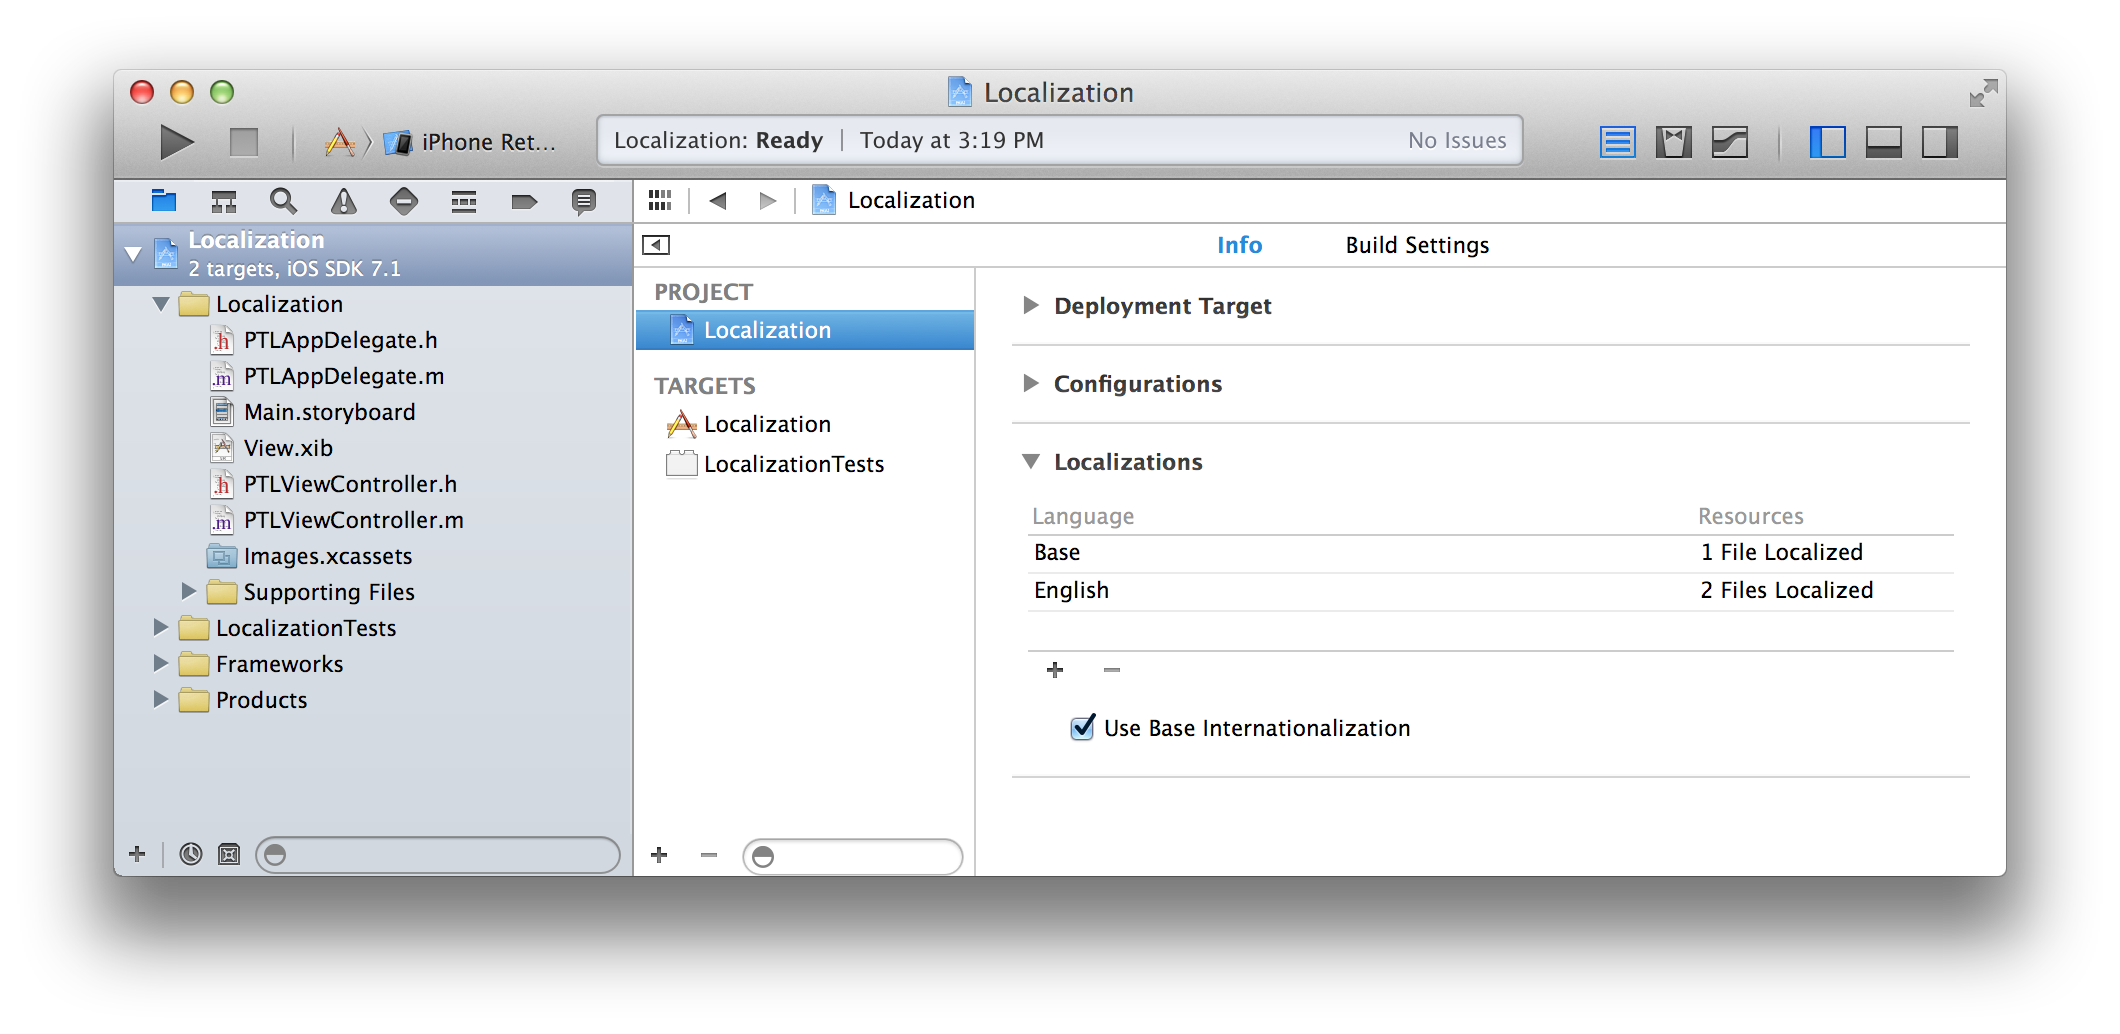
Turn on Base Localization (if it’s not already on—it defaults to on in new projects). Then, add all the languages that you want to localize into.
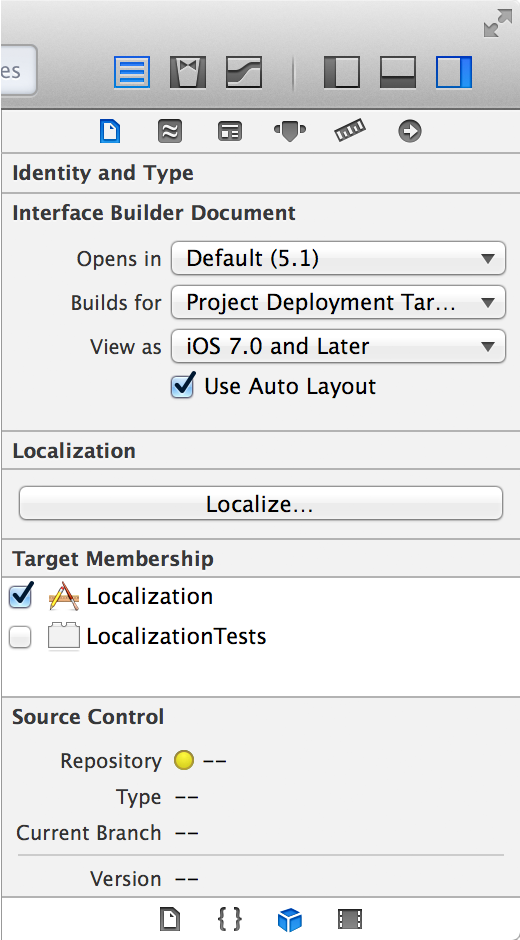
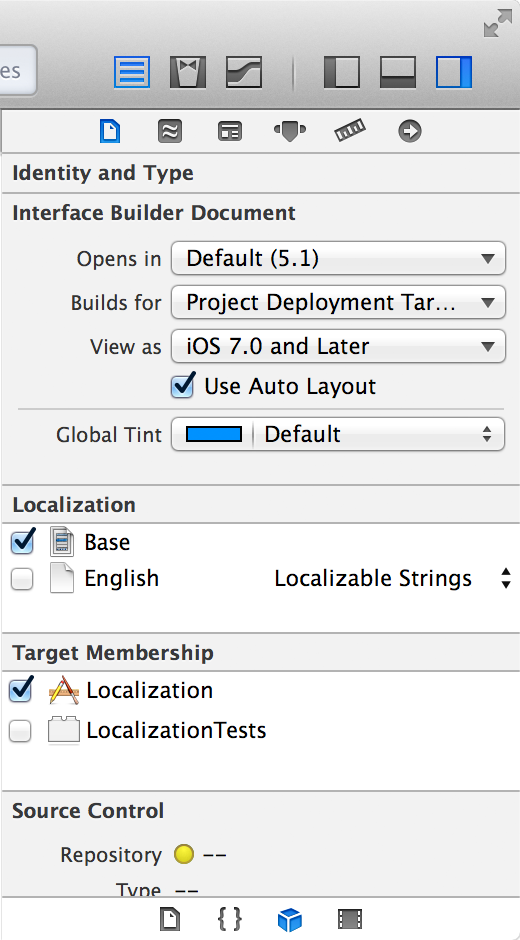
Open a nib or storyboard. In the File Inspector (first icon) in the right sidebar of Xcode, there should be a “Localize…” button or a “Localization” section.
If there’s a “Localize…” button, push it, and localize the nib or storyboard as “Base”. Then, check all the checkboxes in the “Localization” section, and make sure all languages are localized as “Localizable Strings”.
3. Localize your images, strings files, and other resources.
In your app, you may have some images that need to be localized, because they have words or other language-specific symbols in them. If you’re using an Xcode Asset Catalog, you should take all of those images out of the catalog. Unfortunately, Xcode 5.1.1 doesn’t support localizing images in asset catalogs…yet.
Turn on localization for each of these files by clicking the “Localize…” button, the same way you did with the nibs. This time, however, localize the image as English (or whatever your main language is). Add more versions of the image by checking the checkboxes, and then replace the files that Xcode generates with your actual localized asset.
Work to do before every release
4. Generate strings files from your code.
Apple makes this great utility called genstrings that extracts the literal strings from your code. Basically, just run genstrings path/to/all/m/files/*, and it’ll generate a Localizable.strings file (and any others, if you use NSLocalizedStringFromTable) for you to upload. There are lots of options for it, if you need to control the output directory, etc.
5. Regenerate nib and storyboard strings files
Xcode makes it easy to generate nib and storyboard strings files…once. But if you change anything in them, it won’t update the .strings files. facepalm.
Since Xcode won’t help us here, we’ll use ibtool to regenerate the strings files. ibtool has one major bug though—it generates UTF-16 .strings files with byte-order marks, and Xcode 5.1.1 generates UTF-8 files with no BOM…and refuses to compile with otherwise-empty files with a BOM. Long story short, you should actually run:
TF="tempfile.strings"
rm -f "$TF"
ibtool --export-strings-file "$TF" View.xib
iconv -f UTF-16 -t UTF-16BE "$TF" | iconv -f UTF-16BE -t UTF-8 > View.strings
rm -f "$TF"
6. Translate your strings files, then put them back.
I can’t really help you much with this part. It totally depends on how you decide to translate the strings. Basically, the idea here is to take all of the strings in an en.lproj directory, translate them, then put them back in fr.lproj, es.lproj, etc.
And that’s it! Translating your app is the most important of international growth. There’s more to do, though—check back for an odds-and-ends of localization next week!
Leave a Reply